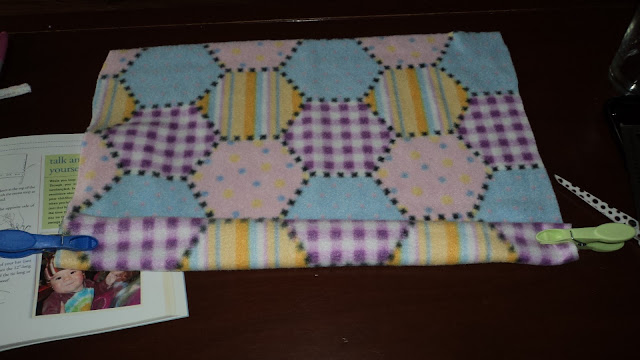
My first step was to get measurements. It told me to measure baby's head around the widest part and from the bottom of the ear to the top of the head. Or, instead, measure a baby hat. Well, I have neither yet, so I had to improvise. With a quick bunch of messages to my sister, I got a couple of measurements from my 5 month old nephew Cormac. I figured that would be a good size.
You need to start with a piece of felt 15 inches by 22 inches. Fold it in half lengthwise, keeping the fold to the left. Cormac's head, I'm told, is 43 cm around. The book told me to halve it (21.5 cm) and add half an inch. One inch is about 2.5 cm, so I added the 2 to make it 23.5 then just rounded up to 24. Mark and cut the excess off the right side.
Unfold the fabric again, then measure and fold up about 1.5 inches, and do it again to get a double fold. Pin.
I could not find my safety pins, so I used clothespins. Fold the hat in half again.
Here's where I strayed from the pattern. You are supposed to use eyelet pliers to punch holes up both sides and then 'sew' them with extra fleece. I do not have eyelet pliers and could not find a hole punch, so I folded it inside out and got out my needle & thread. I could not get a focused picture, but here is the one from the book.
This is where you use the second measurement. Cormac is 13 cm from bottom of ear to top of head, you take that measurement and add 2 inches. Easy. I basically eyeballed it and when I thought I had it high enough, i measured and marked it. It was easy to measure up 13 cm and flip the ruler over to add 2 inches, no math needed! You can just barely see the pink dot at the end of my sewing below.
Flipped back inside right, here is the seam running up what will be the back.
Next, you cut the excess vertically down, making a fringe. I though I would save time by tying then cutting. I was wrong and ended up untying and re-cutting it. Finally, gather the fringe and tie it off tightly with an extra piece of fleece.
I thought the fringe was to long, so after the first picture, I trimmed them a bit.
I have no baby to model it, so Kermit the Frog will have to do :-) His head s a bit small, so i went for the full face effect.
Ta-da! Now, let's hope it fits when baby comes!
It has been a busy weekend here, I made this, I baked a crazy amount for my Foodie Pen Pal, plus we went to baby classes all day Saturday and a couple hours Monday, and I spent three hours at the hospital Monday for a glucose challenge & blood work. So, even though today is Tuesday, to me it feels like Monday. Here's hoping the rest of the week goes by fast!!
Have a good week, everyone!!
~Natasha,


No comments:
Post a Comment